
Building Dynamic Single-Page Applications with React Router
Learn how to use React Router to navigate in a single-page application created using React.


Overview
Hey everyone! I hope you'll are doing well. In this blog, I'll get you started with React-Router so that you can easily navigate to different pages of your single-page website or web app.
Here are the things we are going to cover in this blog
Set up a React project with the help of Vite (BONUS)
Using React Router to navigate through different pages.
Why use React-Router?
Without deep diving, React-Router helps us create single-page applications that feels like a multi-page application. We can handle routing to different pages without having to reload the entire page every time a user navigates to a different page. This leads to a better user experience and faster page load time.
If you thinking why can't we use anchor tags, then the answer is simple it will not serve the purpose of a single-page application. Whenever a user will click on one of the links it will cause the page to reload, resulting in more page loading time.
Step 1: Setting up React with Vite
The new updated docs of React now no more suggest creating React app with 'create-react-app' command, instead it recommends using frameworks such as NextJS.
So first, we will create a folder with the name let's say 'React-Router'.

Now right-click on it and select open with VS code.
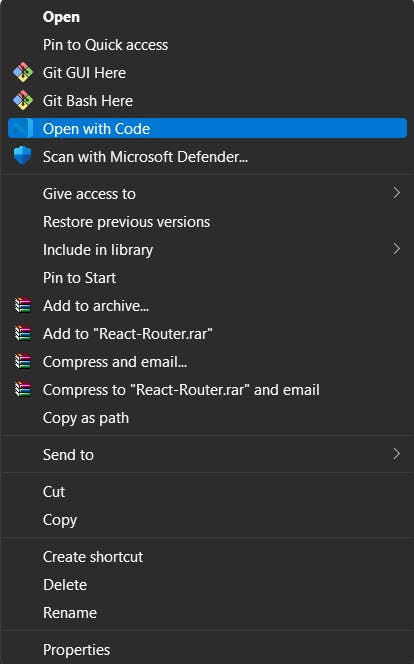
If you don't see this option directly open the folder from your VS Code.
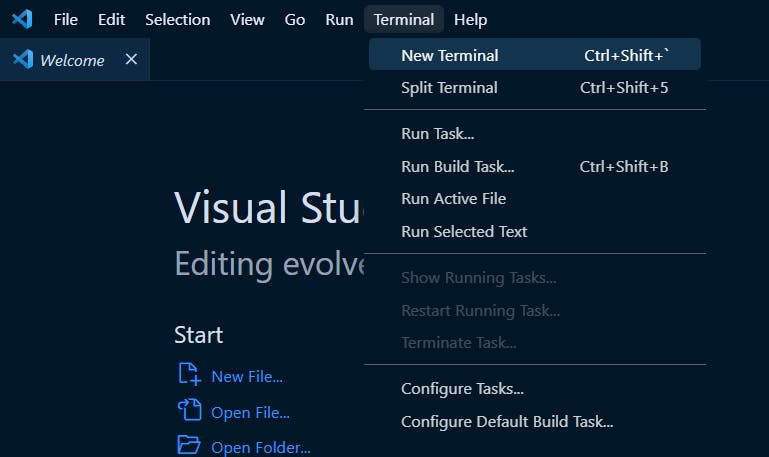
Now open a new terminal in your VS Code.
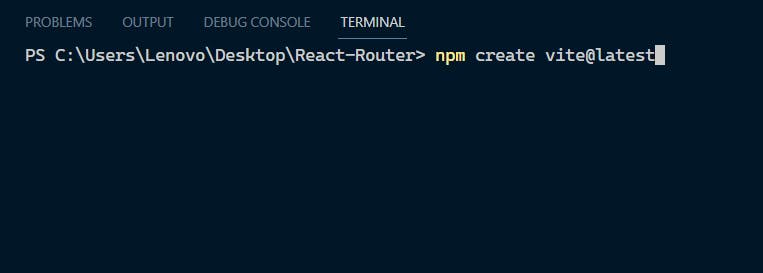
Run the command npm create vite@latest in your terminal.
After you run this command you will be prompted to add the project name, you can enter any name of your choice, but here I will not be creating a new directory and install React in the very same folder. After that press enter to select the package name, then select framework as React and variant as JavaScript.
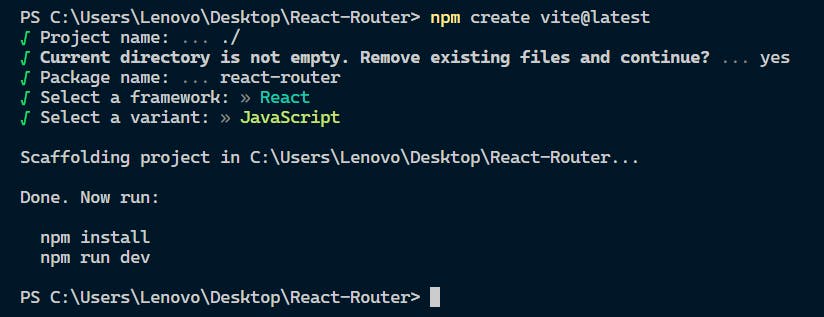
Then follow the steps as shown, i.e. npm install(if you have not created any new folder) or if you have created a new folder then move inside it using the cd your_folder_name command and do the rest of the steps.
After following these steps you should see a typical React folder structure use npm run dev to check if everything is working or not, you should see a page which says Vite+React. Now, clean up or set up your App.jsx folder according to your convenience and let's now move forward and learn REACT-ROUTER.
React-Router
Since React-Router is a library we need to install it first using npm. Run npm install react-router-dom localforage match-sorter sort-by command in your terminal to install react-router-dom and that's it for now!
Now we will create three components to see React-Router in action, i.e. Navbar.jsx, Home.jsx and About.jsx
I would be using Tailwind here for basic styling you can do it on your own. Or just for the sake of learning you can style it later. The way you create your Homepage and About page is completely up to you we'll not cover styling in this blog.
Importing required components from react-router-dom
import {
  BrowserRouter as Router,
  Route,
  Routes,
} from "react-router-dom";
These are required imports for basic navigation between pages.
BrowserRouter as Router (we will use browser router with the name router)
Route
Routes
Import them into your 'App.jsx' file.
Also, import your Navbar, Homepage and About page in your 'App.jsx'
Using the react-router-dom components
import {
  BrowserRouter as Router,
  Route,
  Routes,
} from "react-router-dom";

import Home from "./components/Home";
import Navbar from "./components/Navbar";
import About from "./components/About";

export default function App() {
  return (
    <Router>
      <Navbar />

      <div className="w-full flex justify-center items-center bg-slate-600 h-[94.5vh] "> {/* These are styles to just make the container div look good when the components are rendered */}
        <div className="w-1/4  bg-red-600 h-80 text-center flex flex-col justify-center items-center rounded-xl hover:bg-red-700 transition hover:text-zinc-100">

          <Routes>
            <Route path="/" element={<Home />} />
            <Route path="/about" element={<About />} />
          </Routes>

        </div>
      </div>
    </Router>
  );
}
Concerning the above code sample from 'App.jsx', as we can see we are rendering our components inside the <Router> component.
The <Router> component listens to any change in the current URL and renders the appropriate React component. Hence <Router> should be used at the top level.
Inside the <Routes> component we use the <Route> component to specify the path and where it should take when the links in the navbar are clicked.
The path attribute in a component is used to specify the URL path that the route should match. When the user navigates to a URL that matches the path of a component, the component is rendered.
The element attribute in a component specifies which component is to be served based on the link that is clicked by the user.
Using the <Link> component in Navbar
import React from "react";
import { Link } from "react-router-dom";

function Navbar() {
  return (
    <div className="flex justify-between items-center px-2 h-10">
      <p>myWebsite</p>

      <div className="px-2 ">
          <Link to="/" className="mx-2">Home</Link>
          <Link to="/about">About</Link>
      </div>
    </div>
  );
}

export default Navbar;
Here is a basic navbar structure having Home and About buttons/links. It contains <Link> components to link to the page that has to be served when the specified link is clicked.
The <Link> component in React Router is used to join various routes in your application. It is comparable to the standard HTML anchor tag <a>, except instead of refreshing the page when clicked, it updates the URL and renders the appropriate component using client-side navigation.
The URL path that the link should point to can be specified using the to prop of the <Link> component. React Router intercepts the click event when a user clicks on a <Link> component and changes the URL using client-side navigation without refreshing the page. By doing this, the proper component is rendered using the new URL.
Boom! The navigation bar should now perfectly work and render the required page when the links are clicked.
Congratulation! This much of React-Router is enough for you to create dynamic single-page websites using React. If you have any feedback please feel free to leave them here in the comments. You can follow me on Twitter as well.
See you next time.